Proofing bread in oven is a great method, especially when it’s cold outside. While most home bakers do not own a proofing box, there is a simple method for proofing dough at home. Follow along to learn how to proof bread in the oven without any special equipment!
What exactly is proofing?
The final rise of a yeast dough before baking is referred to as proofing. Because it is a continuation of the fermentation process, the terms proof and fermentation are sometimes used interchangeably.
Fermentation, and thus proofing, refers to the process by which yeast feeds on the sugars and starches found in yeast dough. The yeast produces ethanol and carbon dioxide as it feeds, which causes the dough to rise. This process is also responsible for the distinct flavor of yeast breads.
Can I leave my dough to rise at room temperature?
Proofing can be done at home without the use of any special equipment or even a warm environment. However, keep in mind that a cooler room temperature will lengthen your proofing time, whereas a warmer temperature will shorten it. Slower fermentation always results in more flavorful bread, so there is no need to rush the process if you are not in a hurry.
However, if you need to get your dough moving, simply place it in a warm place. A great place for this is right next to a preheating oven. Some of us have problems when our home does not maintain a consistent environment. Temperatures vary throughout the year, and depending on where you live, you may live in an overly humid or overly dry climate.
Yeast prefers warm temperatures, and the ideal temperature range for proofing is 68-81oF (20-27oC). The warmer the temperature, the faster your dough will rise; however, if it is too hot, the yeast will be killed and the dough will not rise at all.
What exactly is a proofer?
A commercial proofer has the appearance of a tall cabinet with a door. The interior temperature and humidity can be controlled and maintained between 60-115oF (16-46oC). It is intended to maintain a consistent environment so that you get consistent results for each proof.
According to America Test Kitchen, when professional bakers allow dough to rise, they frequently use a proof box: a large cabinet with an air temperature of 80 to 90 degrees and a humidity of 75 percent—ideal conditions for yeast activity.
If you want to have precise control over the temperature at which your dough proofs, there are portable and foldable electric proofing boxes made for home use. If you are a serious home bread baker or sourdough enthusiast,
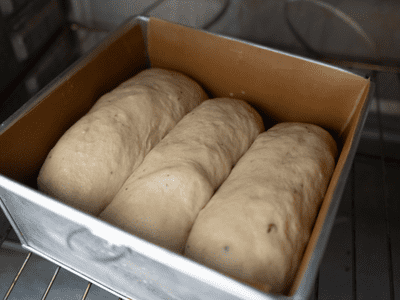
Proofing Bread in Oven
Can you proof on oven? The answer is: yes. If you bake bread frequently enough, or if you simply like the idea of controlling your environment to ensure successful results, you should consider building your own proofer. This is simple to do at home with little to no equipment.
Method Using Hot Water
This method creates a more humid environment, which can be beneficial for proofing dough, especially if you live in a dry climate. If you prefer not to deal with boiling water, see the following method for an even simpler process.
This method is extremely quick and simple, and it’s what I use when I’m in a hurry and just need a little more proofing on my dough. Place your oven rack in the center position. Turn on your oven without anything inside for 2 minutes. Turn off the oven. Mix in your dough: Close the oven door and place your covered dough bowl on the middle rack.
Try not to open the oven door as much as possible to prevent heat and moisture from escaping. After about 30 minutes, check the oven and feel for temperature and humidity. A thermometer is an excellent tool for this. If you need more proofing time, rewarm the water.
Place your oven rack in the center position.
Turn on your oven without anything inside for 2 minutes.
Turn off the oven.
Mix in your dough:
Close the oven door and place your covered dough bowl on the middle rack.
Try not to open the oven door as much as possible to prevent heat and moisture from escaping. After about 30 minutes, check the oven and feel for temperature and humidity. A thermometer is an excellent tool for this. If you need more proofing time, rewarm the water.
5 Bread Proofing Tips

- To prevent sticking, keep hands and other surfaces lightly floured and/or oiled.
- Use proofing containers that are at least two or three times the size of the dough to allow it to rise.
- The ideal temperature for a cold proof is around 50°F, while the ideal temperature for a room-temperature proof is around 75°F. If the dough becomes too warm during bulk fermentation, the yeast will expand faster than the gluten structure. The gluten structure cannot keep up with fermentation, and air bubbles collapse on themselves. Dough should not be proofed above 115°F. However, if yeast becomes too cold (40°F), it will go dormant. When folding and shaping the dough, be careful not to deflate any gas bubbles.
- Consider retarding dough by proofing it at a lower temperature (around 50°F), which will slow the rise and help flavors develop.
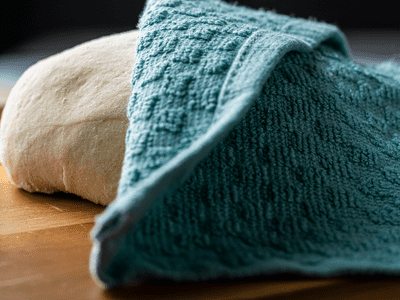
- During proofing, cover the dough with a plastic bag or cloth to prevent it from drying out or forming a skin.
7 Baked Goods That Need Proofing
Any yeast-containing baked good should be proofed to create the air bubbles that make leavened foods taste light and fluffy. This includes the following:
- Viennoiserie: Baked goods with yeast, such as French croissants and Danishes.
- Enriched breads: Yeasted breads like brioche and challah that are enriched with sugar, fat, and sometimes eggs.
- Sourdough bread, whole-grain breads, rye bread, country-style bread, and even gluten-free yeasted breads are examples of yeasted breads.
- Focaccia and Italian Pizza
- Donuts
- Cinnamon rolls
- Breakfast buns
Learn more How to Use Bread Proofer Oven in our blog!