Have you ever tried to use a bread proofer oven? Traditionally, proofing was accomplished by tightly wrapping the dough in a clean cloth and leaving it to sit for several minutes or even hours.
This would waste a lot of time and meant that bread and other yeast product pastries couldn’t be prepared for hours due to the time it took to proof.
The bread proof setting in the oven aims to shorten the time it takes for the yeast to propagate.
In this article, we will go over all of your oven’s proofing functions, how to proof on oven, and the best method for proofing bread dough at home.
What is the Bread Proofer Oven Setting?
The bread-proof setting is the oven setting that allows you to use an oven to activate the yeast in bread or other pastries. Ovens have multiple functions, which is a very welcome addition.
Many people are unaware of or are not taking advantage of a setting on their appliances. One of them is the proof setting. Before you attempt to proof bread in an oven, make sure it has a proof setting. When proofing homemade bread, most oven temperatures range from 70 to 115°F.
Hearing about this feature can be very exciting, but as expected, not all oven types have this setting, which means you cannot proof your bread dough in an oven that does not have the proof setting, unless you want to use another method.
Why Is It Necessary to Proof Bread?

For yeast-based recipes, proofing is usually required. This is a requirement for all yeast pastries and breads. Proofing bread before baking is critical because this is what determines the texture of the bread or pastry after baking.
Proofing is the process of activating the yeast in a pastry or dough, allowing it to rise before baking.
Proofing is an essential part of baking because the majority of the rising process in a dough occurs during proofing.
Before proofing dough can be effective, three things must be in place.
- Yeast, fresh
- Sugar
- Temperature
When the yeast is activated at the proper temperature, a fermentation process begins, causing the dough to expand in size.
Proofing is usually reserved for the fermentation process immediately before baking and does not apply to all yeast fermentation processes.
How Should the Proof Setting Be Used?
You can use the following simple guide for ovens that have dedicated bread-proofing settings.
Step One: Make the Dough
It may take a few minutes depending on what you want to make.
Some doughs also require more time to knead than others. Some recipes specify kneading times as well. Check that your dough has been properly kneaded.
Step 2: Heat a pan
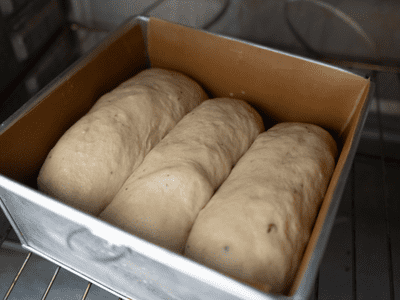
Place the dough in an oven-safe pan once it is ready to proof.
Step 3: Place in the Oven to Proof
Place the pan in the oven for about 15 minutes to proof the dough. Some ovens will set the time for you automatically.
15 minutes is only an average amount of time. Depending on the type of dough, you may need to wait a little longer or less.
Step 4: Remove / Bake
Prepare your dough and bake it. Before baking, you can also knead your dough.
What if your oven lacks a bread proof setting?
Most ovens do not have a dedicated bread-proof setting from which to choose.
If you don’t have such settings, you can manually proof bread using the Boiling Water method.
The Method of Boiling Water
This is a very simple method for achieving the ideal temperature and humidity for yeast activation.
To accomplish this,
Fill an oven-safe pan halfway with BOILING water (about 3 glasses)
Place this pan of boiling water on the bottom rack of your oven.
Take another oven-safe pan and place your dough in it.
Place the second pan in the middle rack of the oven.
Shut the oven door.
Heat the oven to 400 degrees Fahrenheit for about a minute.
Turn off the heat and leave both pans inside the oven to cool.
The amount of time you leave the dough inside depends on how much time is specified in your recipe.
When turning on the oven in step 6, make sure no plastic covers or sheets are inside.
An oven serves as a dough proofing box. As a result, no special proofing ovens, over, or container is required.
Allow the humidity and temperature inside to do their work.
Bread Proofing Set Recommendation
Is the Auto Proof Setting the same as the Boiling Water Method?
People frequently confuse the proof setting with the boiling water method of proofing.
Obviously, they are not the same, as the boiling water method may not always work. Boiling water is placed on the bottom rack of the oven, while the dough is placed on the upper rack; the oven temperature is then set, and the dough is left to proof for a few minutes.
Boiling water in an oven to proof dough is only necessary if your oven lacks a bread proof setting.
The boiling water method is a more rugged approach to proofing that may not always be necessary.
There are numerous variables, such as the rate at which your oven reaches a specific temperature, the size of your oven, the amount of humidity achieved inside, and so on.
Using sensors, the dedicated proof setting in an oven is automatically designed to create the most suitable environment. Some ovens even include humidity and temperature sensors to ensure the best possible environment.
How does oven proofing work? If you want to know more, make sure to read that one article of ours.
Ease
You don’t have to go through all the nitty gritty details of achieving perfection when an oven has a proof setting.
There is no need to boil the water or arrange the pans.
All you have to do is place the dough in the pan and activate the bread-proof setting.
Predesigned
An oven proof setting is usually designed by the oven’s manufacturer, so there are specific instructions on how to use it. It doesn’t take much guesswork because the controls are preplanned and already on the oven.
When there are no other options, the boiling water method is usually used. If you didn’t know much about it before, your exploration may not produce the desired results.
Effectiveness
Manual methods such as the boiling water method and the bread-proof box are not always effective. This is especially true if you are a beginner baker.
If you use an oven proof setting, however, it will most likely work if you follow the instructions.
Conclusion
In this article, we learned what the bread proof setting on an oven is. This setting is mostly found on newer ovens, so if yours does not have one, you can use another method to proof your dough and pastries.
Finally, check all of the controls and their functions to see if your oven has a bread proof setting.
If you don’t find one that says “proof,” your oven might not have one and you’ll have to look elsewhere.