How does oven proofing work? Can you proof on oven?
Baking simple yeast bread recipes is one of my favorite activities, especially when the weather begins to cool and I crave all of my favorite comfort foods. To achieve the nice and fluffy rise of yeasted bread, you must first learn the fundamentals of proofing bread dough.
In a nutshell, proofing dough is the final rise before placing it in the oven to bake. Keep in mind that yeast proofing and bread dough proofing are two separate steps. Proofing yeast is the process of starting the fermentation process by combining warm water, yeast, and a pinch of sugar. Proofing bread dough, also known as final fermentation, occurs when the dough is allowed to rise between 75 and 80oF. This can be done in a room temperature glass bowl, the oven, a slow cooker, or a proofing box.
How to do Oven Proofing

While most home bakers do not own a proofing box, there is a simple method for proofing dough at home. Follow along to learn how to proof bread in the oven without any special equipment!
What exactly is proofing?
The final rise of a yeast dough before baking is referred to as proofing. Because it is a continuation of the fermentation process, the terms proof and fermentation are sometimes used interchangeably. It’s also an important thing to know how much yeast you’re using. According to Cooking Stack Exchange, aim for about 5% yeast and use cool instead of lukewarm liquid.
Fermentation, and thus proofing, refers to the process by which yeast feeds on the sugars and starches found in yeast dough. The yeast produces ethanol and carbon dioxide as it feeds, which causes the dough to rise. This process is also responsible for the distinct flavor of yeast breads.
Can I leave my dough to rise at room temperature?
Proofing can be done at home without the use of any special equipment or even a warm environment. However, keep in mind that a cooler room temperature will lengthen your proofing time, whereas a warmer temperature will shorten it. Slower fermentation always results in more flavorful bread, so there is no need to rush the process if you are not in a hurry.
However, if you need to get your dough moving, simply place it in a warm place. A great place for this is right next to a preheating oven. Some of us have problems when our home does not maintain a consistent environment. Temperatures vary throughout the year, and depending on where you live, you may live in an overly humid or overly dry climate.
Yeast prefers warm temperatures, and the ideal temperature range for proofing is 68-81oF (20-27oC). The warmer the temperature, the faster your dough will rise; however, if it is too hot, the yeast will be killed and the dough will not rise at all.
What exactly is a proofer?
A commercial proofer has the appearance of a tall cabinet with a door. The interior temperature and humidity can be controlled and maintained between 60-115oF (16-46oC). It is intended to maintain a consistent environment so that you get consistent results for each proof.
If you want to have precise control over the temperature at which your dough proofs, there are portable and foldable electric proofing boxes made for home use. If you are a serious home bread baker or sourdough enthusiast,
How to Proof Bread in the Oven

If you bake bread frequently enough, or if you simply like the idea of controlling your environment to ensure successful results, you should consider building your own proofer. This is simple to do at home with little to no equipment.
Method Using Hot Water
This method creates a more humid environment, which can be beneficial for proofing dough, especially if you live in a dry climate. If you prefer not to deal with boiling water, see the following method for an even simpler process.
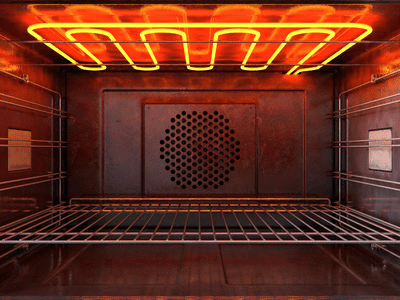
This method is extremely quick and simple, and it’s what I use when I’m in a hurry and just need a little more proofing on my dough. Place your oven rack in the center position. Turn on your oven without anything inside for 2 minutes. Turn off the oven.
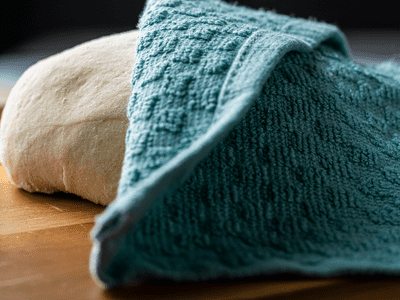
Mix in your dough: Close the oven door and place your covered dough bowl on the middle rack. Try not to open the oven door as much as possible to prevent heat and moisture from escaping. After about 30 minutes, check the oven and feel for temperature and humidity. A thermometer is an excellent tool for this. If you need more proofing time, rewarm the water.
Place your oven rack in the center position.
Turn on your oven without anything inside for 2 minutes.
Turn off the oven.
Mix in your dough:
Close the oven door and place your covered dough bowl on the middle rack.
Try not to open the oven door as much as possible to prevent heat and moisture from escaping. After about 30 minutes, check the oven and feel for temperature and humidity. A thermometer is an excellent tool for this. If you need more proofing time, rewarm the water.
What You Should Know About Proofer Oven Combos

The proofer oven combines a proofing cabinet and a convection oven into a single small footprint. This not only saves space in the kitchen, but it also allows the operator to quickly move dough from the proofer to the oven. This type of unit is sometimes referred to as a baking center because of its convenience.
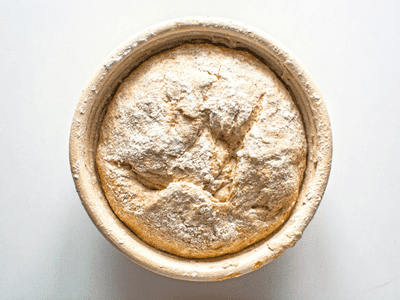
After the dough has been mixed, risen, and shaped, it must rest again before baking. Proofing, also known as final fermentation, is the process of allowing the dough to rise after it has been shaped but before it is placed in the oven. This procedure must be carried out at a temperature of 75 to 85 degrees Fahrenheit and a relative humidity of 85 percent. The dough typically doubles in size during this process, but failing to properly proof your dough can have an adverse effect on the crumb, crust, and overall appearance of the finished product. That is why professional bakers place such a high value on this process.
Which oven doors should I get for my proofer?
Glass doors provide excellent merchandising visibility while also allowing cooks to see into the cabinet without opening it. This, in conjunction with a lighted cabinet, aids in inventory and product quality control. Consider purchasing a unit with field-reversible doors that can be easily converted for left- or right-handed operation. This feature makes it easier to reposition your proofer oven combo.
Which proofing oven features should I get?
Models that maintain humidity must frequently be emptied or refilled by hand, but those with automatic water fills do not.
Digital reminder timers and programmable controls: A proofer oven can be programmed to automatically inject humidity into the chamber, either on a timer or when the humidity reaches a certain level. Individual controls monitor heat and humidity to ensure that the proofing and warming environments are precisely controlled. Even in kitchens with inexperienced employees, these simple controls ensure properly baked bread.
Both gas and electric proofer ovens are available and work the same way. Operators should select the cheapest utility in their area.
Bake-and-hold capabilities: When baking is complete, this feature will switch your proofer oven combo to a lower temperature to keep bread at an appropriate serving temperature.
Should I buy a deck oven or a rack oven?
Proofer ovens with decks and others with racks, like other commercial cooking equipment, are available. This affects how heat is distributed, and your choice will be determined by how you intend to use your oven. Choose a deck oven, also known as a hearth-type oven, if you want to place your bread directly on the cooking surface. Instead of racks, these have large metal or stone slabs to hold foods.
These decks absorb heat and direct it into baking items, resulting in a nice crispy crust. Many proofing ovens of this type allow you to control the temperature of each deck individually, allowing you to bake multiple types of bread in a single batch.
If you plan to do the majority of your baking in pans, a proofer oven with racks is a better option. Racks can be adjusted to accommodate various product sizes, and their perforated design allows convection air to circulate freely for even heating. You should also know the best Bread Baking Temperature to get the best result of your baked loaf.