Learn how to make a proofing ovens to create a warm, humid environment for yeast-leavened bread. All you need is hot water, a baking pan, a thermometer, and a safe place to work. This method will help your baked goods rise regardless of the temperature in your home!
If you’re a baker who enjoys making yeast-risen bread and pastries, you’re probably aware that allowing the dough to properly rise is critical to the final taste and texture. There are several approaches you can take to this stage. If your house is mild enough, you can cover the dough and place it in a warm, draft-free area, but this can be inconsistent, especially since the temperature fluctuates throughout the year.
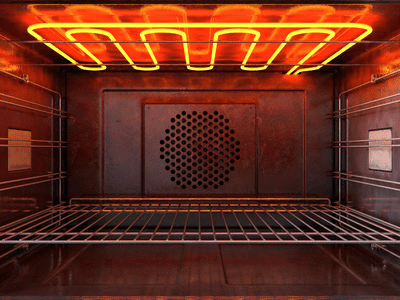
Can you proof on oven? Another method is to warm an oven, then turn it off before placing the dough in it to rise. Although this method is effective, I’ve discovered that overproofing the dough poses a risk. If you forget to turn off the oven or it gets too hot, the yeast produces too much gas, and the dough may deflate before baking if not carefully monitored.
I’ve had the most success with proofing ovens after experimenting with various methods. Cook’s Illustrated came up with a clever idea that uses steam to create the ideal warm and moist environment. You should already have everything you need; all you need is a large glass measuring cup, a baking dish, water, and a thermometer, and you’re ready to leaven!
Making Proofing Ovens
1) Preheat the Oven: Place a baking rack in the center of the oven; this is where the dough will go. Another baking rack should be placed at the bottom, where the baking dish with water will be.
2) Heat the Water: In a microwave-safe bowl (I recommend a large Pyrex measuring cup) or a pot on the stovetop, heat 3 cups of water (720ml) until the temperature reaches near boiling, 200oF (93oC). In the microwave, it takes 4 to 6 minutes. Make sure to use a thermometer to check the temperature.
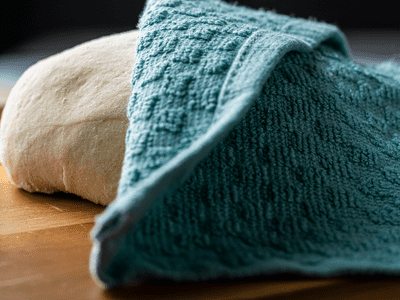
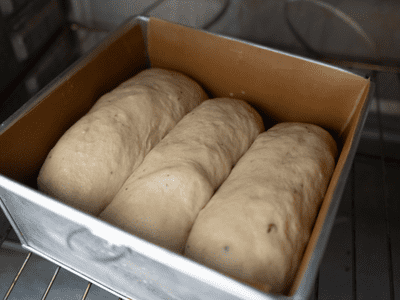
3) Place Dough in Oven: Wrap a kitchen towel or plastic wrap loosely around the bowl containing the large bulk dough or shaped dough. Place it in the oven on the middle rack.
4) Add the Water: Preheat the oven to 350°F and place a glass or metal baking dish on the bottom rack. The shape must be at least 8 to 9 inches in size and can be a rectangle, square, or circle. Pour the hot water into the empty dish with care. Allow the oven to trap the steam and become warm and humid by closing the door.
I keep an oven thermometer or even a probe thermometer in the proof box to ensure that the temperature is not too cold/hot. The temperature should be between 75 and 95 degrees Fahrenheit (24 and 35 degrees Celsius).
Yeast Fermentation’s Role in Bread
Fermentation is the process by which live yeast consumes the dough’s sugars, carbohydrates, and starches. The yeast digests the nutrients after the feeding frenzy, producing carbon dioxide gas and ethanol as byproducts. During baking, the alcohol evaporates, while the gas becomes trapped in the dough’s elastic gluten network. This procedure is critical for the development of flavor and texture in baked goods.
What exactly is proofing?
Proofing is a yeast bread fermentation stage that allows shaped dough to rise before baking. Depending on whether you use fresh compressed yeast, active dry yeast, or instant-rise yeast, you may need to add a bulk fermentation step before proofing to allow the larger mass of dough to rise before shaping.
What exactly is a Proof Oven?
When following a recipe, such as my homemade cinnamon rolls, you’ll be instructed to cover and allow the dough to ferment or rise. Most home chefs do not have a proof box, which is a tall cabinet that maintains an air temperature of 80 to 90oF (27 to 30oC) and a humidity of 75%.
A proof box creates a consistent environment for temperature and humidity control for optimal fermentation conditions. The reason for the need for a warm environment is that yeast activity is at its peak between 75 and 95oF (24 to 36oC), with 77oF (25C) being the ideal dough temperature.
Yeast is slow at temperatures below 70oF (21oC), and inactive at temperatures below 34oF (2oC). At 138oF (59oC), the yeast is dead and will never ferment, so proceed with caution!
Guidelines for Keeping Proof Box Conditions
This method works well for about an hour of oven proofing. Check the oven temperature if you’re doing another stage of fermentation. If the temperature falls below 75oF (24oC), simply reheat the water and return it to the baking dish for the next round.
Try not to open the oven door unless you need to check the temperature.
I like to cover the dough with loose plastic wrap so I can easily see if it has doubled in size. This prevents the oven from constantly losing heat and moisture.
To achieve the best results, use only one recipe at a time.
Before preheating the oven, wipe down the oven door to remove any excess condensation after you’ve finished proofing the dough. Now that your yeast bread has beautifully risen, it’s time to bake it!
I hope you find this method convenient and cost-effective. I’d love to hear about your proofing experiences with this technique or other methods in the comments section below.