What temperature bake bread?
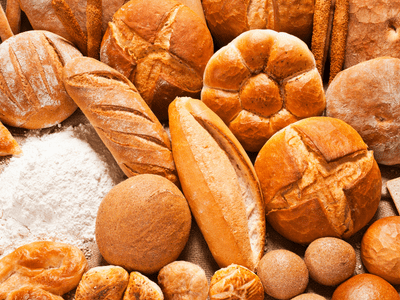
Homemade bread knowledge is an ancient practice dating back to 2000 BC. Before other baking methods, the Egyptians were the first to bake fermented bread. Bread was one of the first foods regulated in New Zealand, thanks to the Bread Ordinance and Sale of Bread Act of 1863. During that time, New Zealand settlers baked bread using two methods: mechanical dough development and bulk fermentation.
The latter method entailed leaving the dough to rise for two hours before dividing it into the desired sizes, a practice that is still practiced today. The mechanical Dough Development method, on the other hand, involved rapidly mixing the dough to cut the time it takes to rise to ten minutes.
Bread was baked in communal ovens, large masonry ovens, or over an open fire back then. Although the massive masonry ovens produced excellent results, the open fire produced loaves that were inconsistent in flavor, texture, and doneness due to the difficulty in maintaining the required homemade bread temperature.
Baking homemade bread has become somewhat easier thanks to modern inventions. Electric ovens allow bakers to easily control the temperature during the preparation, proofing, and baking processes. Furthermore, ThermoPro food thermometers enable bakers to more precisely control the temperature, enhancing the fermentation process and achieving more consistent texture. The discussion expands on everything related to homemade bread.
The Optimal Temperature for Preparation
a) Proofing with yeast
The temperature at which the dough is prepared influences how the yeast proofs and how the bread tastes. To begin, pour warm water into a bowl, add sugar, and stir until dissolved.
Make certain that the temperature is between 95 and 115 degrees Fahrenheit. Increase the temperature to 110-130 degrees Fahrenheit after adding a tablespoon of yeast.
Using a higher temperature, such as 150 degrees Fahrenheit, destroys the yeast before it proofs, while using a lower temperature, such as 105 degrees Fahrenheit, causes the yeast to proof unevenly, affecting the final flavor of the bread.
Allow the mixture to sit for 5 to 6 minutes before adding the flour; the first 2-3 minutes allow the yeast to dissolve into the water, while the remaining three minutes help the yeast grow. Tiny bubbles should form on the surface; however, if you use musty yeast, it has no effect. It explains why proofing is necessary before adding the flour.
b) Flour Addition
Mix in the room temperature flour and salt. Avoid using frozen flour because it causes the dough to rise slowly. To prevent rancidification, whole-grain flour, for example, should be stored in the freezer.
If you use such flour, remove it from the freezer before beginning the preparation process to allow it to warm up to room temperature.
To ensure accuracy, measure the temperature of the flour with the ThermoPro TP-03 Digital Instant-Read thermometer. To raise the temperature of the flour, some people prefer sifting it through a sieve. To prepare the dough for kneading, combine the ingredients.
This should take 6-8 minutes to make a smoother, less sticky dough.
Temperature as the dough rises
After kneading the flour, transfer it to a large, oiled mixing bowl and cover with a damp towel or plastic wrap for one to two hours to allow the yeast to grow. The ideal temperature for the fermentation process is between 75 and 85 degrees Fahrenheit; lower temperatures cause the dough to ferment more slowly, while higher temperatures produce unsavory flavors.
If your oven has a proof setting, set it to this temperature for best results.
Because the air is lighter in cold weather than in hot weather, the dough rises faster. It explains why people who live at high elevations should use a small amount of yeast. After two hours, knead the dough to remove any air bubbles.
Because there is twice as much yeast in the dough, you can allow it to rise again after kneading. The second rising is optional and should last 30 to 60 minutes. Knead it once more before shaping it.
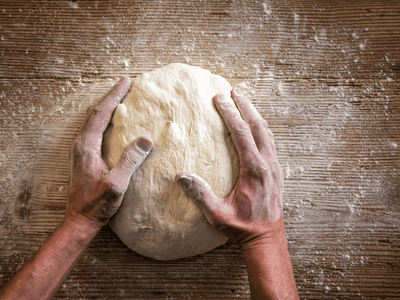
Forming the Dough
Allow the dough to rest for a few minutes after kneading the bubbles out. This procedure relaxes the gluten and makes shaping the dough easier.
When making the famous French bread, cut the dough in half to make two equal shapes. Cut the dough into oval shapes for baking the Italian style bread. Make sure to tuck the bottom into the rest of the dough so that it is not exposed when baking to ensure an even texture.
Place the dough in a bowl with the smooth side facing down. To prevent sticking, lightly oil and flour the mixing bowl.
Cover the bowls with a damp towel and set aside for an hour before putting the dough in the oven. To see if the dough is ready to bake, gently poke it on the side.
If it does not immediately spring back and the finger leaves a slight impression, it is ready for baking. To ensure an even bake, the dough should rise slightly; over-risen dough does not result in a lighter loaf of bread. The dough, on the other hand, collapses and forms dense, unsavory bread.
As a result, knead the dough out and reshape it if it over-rises after shaping. This is why bakers should use flour that can withstand several risings before the gluten breaks down.
Preparing the Dough for Baking
Cuts can be used to create simple patterns on the upper part of the dough. The patterns leave plenty of room for the bread to expand. Dress up the dough as well for a shinier bronze surface. Most people prefer egg white wash because it results in a glowing bronzed upper surface of the baked loaf.
If you want a crunchy crust, use a pastry brush to apply cold water to the top. It not only makes a crunchy crust, but it also speeds up the steaming process. Whole egg wash, milk wash, butter, and egg yolk wash are some of the other ingredients used to dress up the dough.
What Temperature Bake Bread
The ideal baking bread temperature is determined by the type of bread being baked. Lean-dough bread, for example, bakes at 190-210 degrees Fahrenheit, while heavier dough bread bakes at 180-200 degrees Fahrenheit. You can bake the bread in two ways: preheat the oven for 15 minutes to 475 degrees Fahrenheit or place the dough directly into the oven without preheating.
If you’re preheating the oven, make sure to generate steam by placing a pan of water in it and leaving it to heat at that temperature (475). Other methods for producing moisture in the oven include:
Misting: spray the side of the oven with water and close the door. The heat converts water to steam, which raises the humidity level in the oven.
Using ice cubes: Place a glass or ceramic bowl filled with ice cubes in the oven for 10-15 minutes. When all of the ice has melted, remove the bowl.
After preheating the oven, add two to three cups of water to the pan before placing the dough on the rack to bake. Allow it to bake for 20 minutes, but check for browning after 15 minutes.
Reduce the temperature to 450 degrees Fahrenheit if the crust is too brown. When the loaf is fully baked, check the underside to see if it feels soft and hollow; if not, leave it in the oven for five minutes longer.
The recipe should help you determine when the loaf is done. Professional bakers advise checking a few minutes before the actual baking time, especially if the crust is darkening. The crust should be golden brown in color.
If you want a soft, crunchy crust, turn off the oven after the bread has baked to lower the bake bread temperature and leave it closed for 5-10 minutes. Bread that is properly done is firm; if it is too hard, it has been overdone. Bread that is too spongy, on the other hand, is undercooked and may require an additional few minutes in the oven.
Baking Times for Different Types of Bread
Bread Type Time 5-15 minutes for thin flat bread Breads baked on flat surfaces and large country rounds 35-50 minutes 15-20 minutes for the buns and rolls 45-75 minutes for quick breads 15-25 minutes for thick flat breads Loaves baked in a loaf pan 45 to 60 minutes
If you do not intend to serve the bread right away, it is critical to allow it to cool completely after baking. Place it on a raised wire rack to cool after removing it from the oven. By allowing internal steam to escape through the crust, the rack improves uniform cooling. Furthermore, it keeps the bottom of the bread from becoming damp if it is left on a pan or other flat surface that traps the steam.
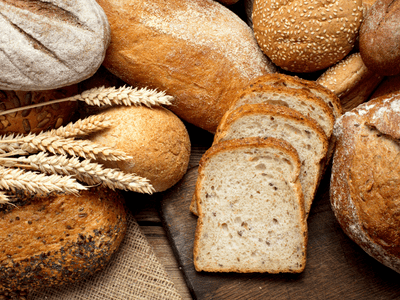
Cutting the Bread
Allow the bread to cool before slicing it because slicing loaves right out of the oven is more difficult. To avoid cross-contamination, place the bread on a flat, wooden surface and avoid using boards used for chopping vegetables or meat.