How to use a bread proofing oven? Is it possible to proof dough in the oven? Yes, and here’s how.
One of the most difficult aspects of making bread at home during the winter is dealing with cold temperatures. Ironically, many people get the baking bug during the winter. It takes a little more planning when baking bread.
Cold weather is difficult because many recipes are written for average room temperatures, which are usually between 68 and 78° F. In my experience, most recipes are written for the upper end of that scale. This has more to do with yeast than anything else. Bakers have settled on 75-80° F as the sweet spot for yeast in bread making over many years (I just read a book from the 1800s last night).
Other than that, as stated by The Bread Guide, using a proofing box will not only improve the texture and volume of your finished product, but it will also reduce your proofing time (if you use room temperature to proof your dough) by about 25%.
That means that for many of us, winter simply does not provide the necessary room temperatures. And, for many of us, the oven is the first place we look for assistance. Can we, however, use the oven to proof dough?
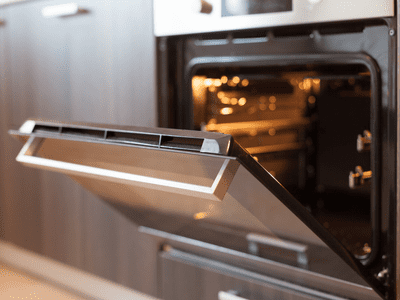
Even though an oven should not be turned on while dough is inside, it is a great place to proof bread dough. There are three common methods for oven proofing that do not require you to turn on your oven.
- Putting a pot of boiling water in the oven.2. Turning on an oven light.3. Putting a hot cast iron skillet in the oven.
It is far safer for your yeast if you do not turn on your oven at all to avoid overheating it. As temperatures rise above 120°F, yeast will die. They die once the temperature reaches 138°F. We would avoid turning on the oven unless you have a reliable thermometer to use in it, even if doing a on and off method.
The only exception is if your oven has a reliable proofing setting. Ours is unreliable and keeps the temperature around 100 degrees. That’s a little too high for great gluten development.
And, to be honest, we find the three methods to proof on oven listed above to be easier to monitor. In our experience, each has its own merits and applications. Let us now examine them.
Make a Bread Proofing Oven
Using a Water Boiling Pot
Using a boiling pot of water is extremely effective and adds moisture to your proofing period. Unless you frequently have issues with too much moisture where you live, this is ideal for dough.
One thing to keep in mind when working with a pot of water for proofing is to keep the dough away from the water. For a while, the water will be quite hot, and the area around it will be much warmer than yeast can tolerate. Allow a few inches between the two containers.
If your oven has enough space, place the dough and water on separate racks.
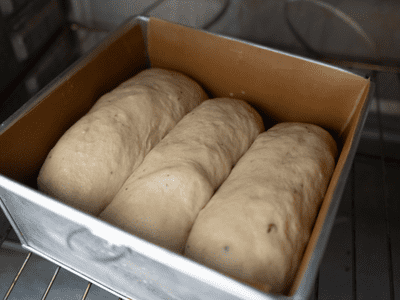
If you are proofing for an extended period of time, such as sourdough, you may need to refresh the boiling water every 40 minutes to an hour. However, this is dependent on how cold your house is, how well your oven traps heat, and how much water you put in there. You’ll be fine with just one pot if you’re making sandwich loaves that only take an hour to rise.
As previously stated, the amount of water used affects how long the oven stays warm. Larger pots of water will retain heat for a longer period of time. This has to do with a variety of issues involving energy laws.
Larger masses of water take longer to boil and also longer to cool. The most important factor is how long it takes to cool. If you’re making bread that takes longer to proof, it might be worth it to invest in a larger pot.
Just make sure your oven doesn’t start to get hotter than 120 degrees. That is far too warm for optimal results. To solve the problem of too much heat, simply leave your oven open until the temperature drops to around 100 degrees.
It shouldn’t take long before you’re ready to leave it alone for the majority of your proofing time. However, if this is your first time, keep an eye on the oven to make sure it doesn’t get too hot or too cold.
Making Use of an Oven Light
Using an oven light when baking bread will help to keep temperatures consistent. Unlike with boiling water, there is no need to refresh anything for longer proofing. Surprisingly, simply leaving the light on does the job of keeping temperatures optimal. It’s also strange how well it works. It almost appears to have been designed that way.
Even though oven lights in most cases will keep temperatures inside an oven between 74 and 78 degrees, the disadvantage is that it takes a long time to warm up.
This method can take up to an hour to bring an oven up to proofing temperature. If you bake frequently, using your oven light may not be the most cost-effective or practical option.
I also find that when it is extremely cold, our oven struggles in this regard. Many bakers do not have this problem, so it could simply be a difference in models and how well they trap heat.
I also believe it has something to do with the size of one’s oven. Larger ovens, in theory, will not be as efficient with the light method. Ours is a little larger. Just something to think about if you decide to try this one.
Making Use of a Cast Iron Pan
This method is similar to the pot of water method, but it takes less time to reach temperature than boiling water. It also gets to temperature much faster than the light method. It does, however, lack the longevity of the light method as well as the moisture of the water method.
This method entails simply heating a cast iron pan on high for a few minutes before placing it in an oven. If it starts smoking, it is hot enough to use, but it is best to stop it before it starts smoking.
If it does smoke, simply allow it to cool long enough to stop smoking (your dough will absorb the smoke otherwise) before placing it in the oven. We place it on the bottom rack, as far away from our dough as our oven will allow.
When you place the hot pan in your oven, the temperature will rise by 10° or more in seconds. Close the door, and the oven will likely be 20° warmer or more after a few minutes, depending on the season. When we do this, our oven tops out at around 115° F. We simply open the oven door for a few minutes to allow some heat to escape, then place the dough inside and close the door again.
If everything goes well and you have a large enough cast iron, you won’t need to reheat it for proofing times of about an hour. However, if going longer than an hour proof, you may need to reheat the cast iron every 40 minutes to an hour, as with the water method above.
Unfortunately, there are far too many variables to provide an exact figure. However, after your first experience, you’ll have a good idea of what to expect. But, hopefully, these ballpark figures will help you see the big picture when you’re planning this for the first time.
Alternatives to the Oven that are Simple
Microwave: If an oven isn’t quite right for you, a microwave is an excellent alternative to proofing bread in oven. It is much smaller, which we believe makes it better at retaining heat. The microwave’s main disadvantage is its small size. If you’re making larger batches of dough, it’s possible that they won’t fit in the microwave. But if you’ve determined that the size is correct, here’s how we do it.
We cover the top of the proofing bowl with a warm damp towel and place it in the microwave. If you’re going to proof for a longer period of time, you’ll need to refresh the towel.
Proofing Box: If you don’t mind making an extra purchase, a proofing box is about as simple as it gets. It is one of the more expensive baking supplies on the market. However, they are frequently on sale on Amazon, so it’s always worth a look.
With a proofing box, you simply set your desired temperature and it maintains it. This one by Brod and Taylor is collapsible, making it ideal for smaller kitchens like ours. (This link will take you to Brod & Taylor’s website.)