Temp for baking bread at home is really crucial for the result. Bread is a subject shrouded in tradition, lore, and even legend. It is the staff of life, the very metaphor for food and companionship. Baking bread is one of the most ancient practices of civilized society, so it has had plenty of time to incorporate some muddled facts into its production.
Bread recipes frequently include instructions such as “place on warm countertop” or, even worse, “thump bottom of bread to see if it is done.” But, now that we live in a technologically advanced civilization rather than an Iron-age village, how can we cook bread differently? Of course, there’s thermometry. And for bread, you’ll need a ChefAlarm® leave-in probe thermometer.
We’ll use lean-dough breads as an example to discuss the finer points of thermometry in bread making. Lean-dough bread is the most basic type, consisting of only flour, water, salt, and yeast. While the processes differ from one bread type to the next within the class, they all have one thing in common: they contain no fat (hence the name). Rich-dough breads are made with butter, oil, or other fats.
With one notable exception, the thermal principles involved in bread making are essentially the same for rich- and lean-dough breads, and because the lean dough is’simpler,’ we will use one as the template for our discussion.
Bread Baking Fundamentals
There are three major stages in making bread: preparation and mixing, bulk fermentation and proofing, and baking. There is a critical temperature for bread baking element in each phase that can be achieved more precisely with modern thermometry than with pre-industrial techniques. Our forefathers did an excellent job with what they had, but as Nathan Myhrvold and the Modernist Bread team have demonstrated, we can be more precise and achieve more repeatable, exact results by discarding some of the lore and relying on data. So, with that in mind, let’s take a look at how temperature influences bread baking.
Despite appearances, the temperature at which you mix your dough can have a significant impact on the outcome of your bread. The temperature at which your yeast blooms can have an impact on the taste of your bread. Yeast reactivates best at temperatures between 110°F and 130°F (43°C and 54°C). However, raising the activation temperature above 140°F (60°C) will kill the yeast before it can even wake up.
At the same time, if you use water below 105°F (41°C) to wake it up, the yeast will be grumpy and your bread will have off-flavors. You know how it feels to take a cold shower in the morning when you really want a hot one? Yeast feels the same way!
Then there’s the issue of flour temperature. To avoid rancidification, store whole grain flours under refrigeration or even in the freezer. If you add freezing flour to your dough, it will rise slowly. Using room temperature flour eliminates this problem, but if you have cold flour, check its temperature before using it. Sifting it from a foot or two above the countertop is an excellent way to bring it to temperature. The individual grains warm up faster as they fall through the sieve. Check with a Thermapen® to ensure that you are not cold-shocking the yeast.
Temp for Baking Bread
If you want perfect results, bring your dough to a precise starting temperature before fermenting/proofing it. Professional bakers, whose livelihoods depend on consistency, factor in the friction factor of their mixers when calculating the desired dough temperature (DDT). The internal friction of the dough creates heat when kneading it. The heat signature of each mixer is known as the ‘friction factor.’ Professional dough recipes consider that number and have a final desired dough temperature. In fact, given certain variables, there is a formula for the temperature of water to add so that your dough comes out at the desired temperature.
To determine the temperature of the water to add to your dough (not just ‘lukewarm water’! ), Multiply the desired dough temperature by three. Then subtract the room temperature, the flour temperature, and the friction factor of your mixer. What’s left is the temperature of water you’d like to add to your dough.
3 X (DDT) – (room temperature + flour temperature + friction factor) = water temperature*
(This formula applies to the Fahrenheit scale.) A note on Celsius can be found at the bottom of the post.)
Again, a Thermapen mk4 will provide accurate readings and truly repeatable results for all of those temperatures. Keep in mind that this is quite advanced. Most consumer mixers do not publish their friction factors, so you must work backwards to find it empirically, and even if you do, most consumer recipes do not include DDTs. But if you’re serious about it, you’ll start using it.
(If you want an easy way to calculate your temperatures, check out The Perfect Loaf’s Desired Dough Temp calculator.) You can get the equation above by entering ‘3’ for your multiplication factor and ‘0’ for your preference.)
Proofing Temperature
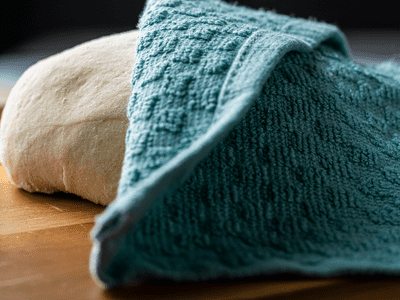
One of my least favorite cooking instructions is “Place the dough in a warm spot in your kitchen.” Warm in the winter or hot in the summer? How hot is too hot? Is it warm enough? Science, it turns out, has an answer to that question. The optimal temperature for fermenting and proofing bread dough, according to Harold McGee, is 85°F (29°C). Temperatures below that point take longer to ferment, while temperatures above that point can cause unpleasant flavors to develop in the dough.
Bakers solve this problem with high-tech proof boxes that use complex algorithms to maintain the exact temperature. Some home ovens have a ‘proof’ function that keeps the oven temperature between 85°-90°F (29°-32°C). More power to you if you have one.
If you do not, I suggest the following solution: For your proofbox, use an insulated cooler. Coolers keep heat in just as well as they keep it out, allowing you to keep your dough at a relatively constant temperature for the hours it takes to ferment. Simply measure out a gallon or so of 95°F (35°C) water using your Thermapen, pour it into the cooler, and either place something in the water for your dough bowl to sit on, or simply float the bowl in the water. Close the lid and let the yeast do its thing! A ChefAlarm probe can also be used to monitor the temperature of the proofbox, ensuring that it stays within the proper range.
To proof (the final rise after shaping) your bread, try to set up a rack of some kind in the cooler on which you can place a pan with the bread.
Why use water that is warmer than the temperature we want our proofer to be? The temperature in such a cooler proofbox is depicted in the graph below. I poured two gallons of 95°F (35°C) water into a large cooler chest. I inserted a probe into the water and an air probe into the air, then left the whole thing alone overnight with the lid closed. I included data until the air temperature fell below 85°F (29°C), which took approximately 3 hours. The cooler’s walls lost heat immediately, and the air was never as warm as the water.
Baking temperature
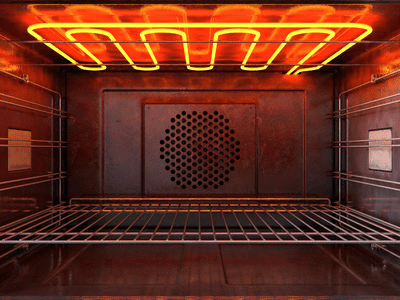
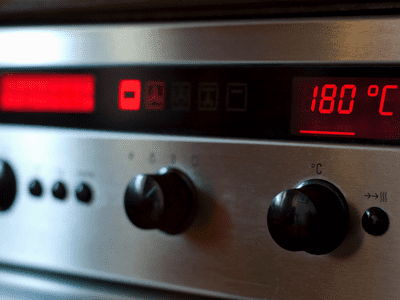
It’s time to bake your bread after it has properly proofed. Oven temperature is important and should be followed according to the recipe, but most breads are cooked at a high temperature to create leavening steam inside the bread.
Though you are not required to measure the bread temperature at each stage of baking, it is an interesting thermal journey to see how temperature affects the bread during baking. To that end, here are the stages of bread baking: