Can you proof dough in oven? Although the majority of home bakers do not own a proofing box, there is a simple way to proof dough in the comfort of your own home. By following the steps in this tutorial, you will soon be able to learn how to proof bread in the oven without the use of any specialized equipment!
What exactly is “proofing”?
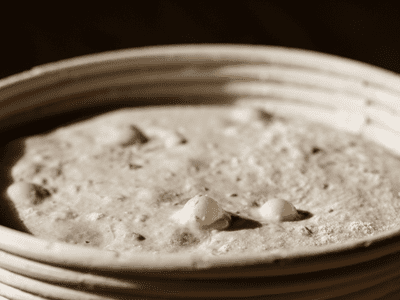
Proofing is the term used to describe the final rising that takes place in yeast dough before it is baked. Due to the fact that the proofing process is essentially a continuation of the fermentation step, the terms fermentation and proof are sometimes used interchangeably.
The act of yeast feeding on sugars and starches that are present in yeast dough is the process that is referred to as fermentation, and therefore proofing. When yeast is allowed to feed, it produces ethanol and carbon dioxide, both of which contribute to the rising of the dough. This process is also responsible for giving yeast breads their unique flavor in the end product.
I’d like to proof my dough at room temperature, is that possible?
The process of proofing can be carried out at home without the need for any specialized equipment or even a warm environment. Be aware, however, that if the temperature in the room is warmer, the proofing process will go more quickly, whereas if the temperature is cooler, the proofing process will go more slowly. Bread that has undergone fermentation for a longer period of time will invariably yield a more flavorful end product; therefore, if you are not in a hurry, there is no reason to try to speed up the process.
If, on the other hand, you find that your dough is not moving as it should, you can easily get it to do so by placing it in a warm location. Right next to an oven that’s being heated up would be an ideal location for this. The problem that arises for some of us is that our homes do not always have the same atmosphere. Temperatures go up and down throughout the year, and depending on where you live, you could be living in an area that has an excessive amount of humidity or one that has an excessive amount of dryness.
Yeast thrives in warm environments, and the temperature range of 68 to 81 degrees Fahrenheit (20 to 27 degrees Celsius) is optimal for proofing. Your dough will rise more quickly if the temperature is higher; however, if it is too high, you risk destroying the yeast, which will result in the dough not rising at all.
Who exactly is this proofer?
The typical appearance of a commercial bread proofer oven is that of a tall cabinet with a door. The internal temperature can be controlled and maintained anywhere between 60 and 115 degrees Fahrenheit (16 and 46 degrees Celsius), and the humidity can range from about 60 to about 90 percent. It is constructed to maintain a constant environment in order to provide you with results that are reliable across all of your proofs.
If you are interested in having precise control over the temperature at which your dough proofs, there are also portable and foldable electric proofing boxes made for home use. These boxes can be found in the marketplace. In the event that you are a dedicated bread baker at home or sourdough
How to Proof Dough in Oven

If you bake bread frequently enough, or if you just like the idea of being able to control your environment to ensure successful results, you may want to think about installing your own proofer in your kitchen. You won’t need much in the way of special tools to accomplish this simple task in the comfort of your own home. This is how you do oven proofing.
The Method of Hot Water
This technique results in a more humid environment, which is beneficial for the proofing of dough. This is especially true if you live in an area that is known for its arid conditions. See the next method for a procedure that is even less complicated if you would rather not deal with water that is boiling.
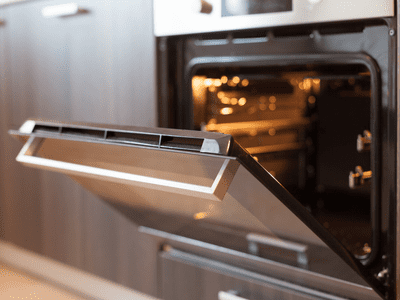
When I’m in a pinch and my dough needs a little bit more proofing, I usually turn to this method because it’s very quick and simple. Adjust the rack in your oven so that it is centered in the oven. Start the oven but don’t put anything in it for the first two minutes. The oven should be turned off. Add your dough: Close the door of the oven after positioning the bowl of dough on the middle rack and covering it with the lid.
It is in your best interest to minimize the number of times the oven door is opened in order to prevent the loss of both heat and moisture. After waiting for approximately thirty minutes, you can perform an oven check and get a sense of the temperature and humidity using your hands. A thermometer is an effective instrument for this purpose. If additional proofing time is required, the water should be rewarmed.
Adjust the rack in your oven so that it is centered in the oven.
Start the oven but don’t put anything in it for the first two minutes.
The oven should be turned off.
Add your dough:
Close the door of the oven after positioning the bowl of dough on the middle rack and covering it with the lid.
It is in your best interest to minimize the number of times the oven door is opened in order to prevent the loss of both heat and moisture. After waiting for approximately thirty minutes, you can perform an oven check and get a sense of the temperature and humidity using your hands. A thermometer is an effective instrument for this purpose. If additional proofing time is required, the water should be rewarmed.